
Learn how to process media using RMS Console. The Transforms and Jobs will help you convert your uploaded assets into ready-to-use media files.
In this article:
Before you begin
Media processing allows you to prepare your content for different delivery scenarios. With RMS Console, you can submit tasks like transcoding videos to different formats, extracting thumbnails, adding closed captions, and more. Decide what result you want to achieve, and the following steps will help you get there:
1. Upload a media file to the asset
2. Select or create a Transform - a template that defines how media will be processed
3. Create a Job for uploaded media using your selected Transform
4. Monitor your Job's progress
5. Use a processed output for publishing
Transforms
A Transform includes one or more presets that define the specific processing tasks for your media. Think of a Transform as a recipe for how your media will be prepared for playback, storage, or distribution.
Transform creation in the RMS Console currently supports creating only one output per transform. As a workaround, submit a subsequent job for the output asset to achieve the desired result (e. g. apply an AudioAnalyzer preset to the processed media).
You can select from your existing Transforms or create new Transforms when you need specialized processing options:
Select a Transform
1. Navigate to the Transforms list to view all available transforms.
2. Filter by name to find transforms. Search requires exact matching text.
3. Select a Transform to view its associated Jobs.
Click View outputs to see the transform's preset and JSON:
A detailed JSON is visible for custom presets. For the Standard built-in presets, only the template name will be displayed:
Create a new Transform
If you need a different Transform from those available, create a new one with the following steps:
1. Navigate to the Transforms list and Click + Create Transform.
2. Pick a Standard built-in preset or a Custom JSON preset tab.
- To add a Built-in preset, select the option in the dropdown list.
- To add a Custom JSON preset, paste your JSON preset. Use Insert sample to populate an editable JSON preset sample or Format JSON to auto-edit your code.
RMS supports many transform configurations, but some custom presets may need adjustments. If a preset does not work as expected, request help from Ravnur support.
3. A Transform name will be generated (named as CustomPreset_{timestamp}). Optionally, change the name of your transform and add a transform description.
4. Click Create transform.
The ability to delete transforms from the Console will be available soon.
Jobs
Jobs are used to process media files. A job applies specific transformations to your input files to produce the desired output. These transformations can include format conversion, metadata extraction, thumbnail creation, and more.
Create a job
1. Submit a Job in one of the following ways:
- Open the Transforms tab and click + Create job.
- Open the Assets > Asset details page and click plus sign + Create job.
2. Select your input asset using one of these methods:
- Click Select an existing asset to choose from previously uploaded assets.
- Click Upload an asset to upload a new media file directly.
If you created a job from the Asset details page, the input asset is already selected.
3. Select a Transform from the dropdown list.
4. Configure output and job settings:
- Output asset name: Use the auto-generated name (InputAssetName_Output_{timestamp}) or enter a custom name for the automatically created output asset. You can also select your existing asset instead.
- Job name: Use the auto-generated name (InputAssetName_Job_{timestamp}) or enter a custom name.
Asset storage account is autoselected based on the Primary storage account set. If you need the output saved explicitly into a different storage account, change it via the dropdown menu. Note that you need to add a storage account to the RMS Console first.
5. Click Create job.
You can also start a Job using an External URL instead of the asset. The base URI should be a valid HTTPS URL that links directly to the media file (not a webpage containing the media).
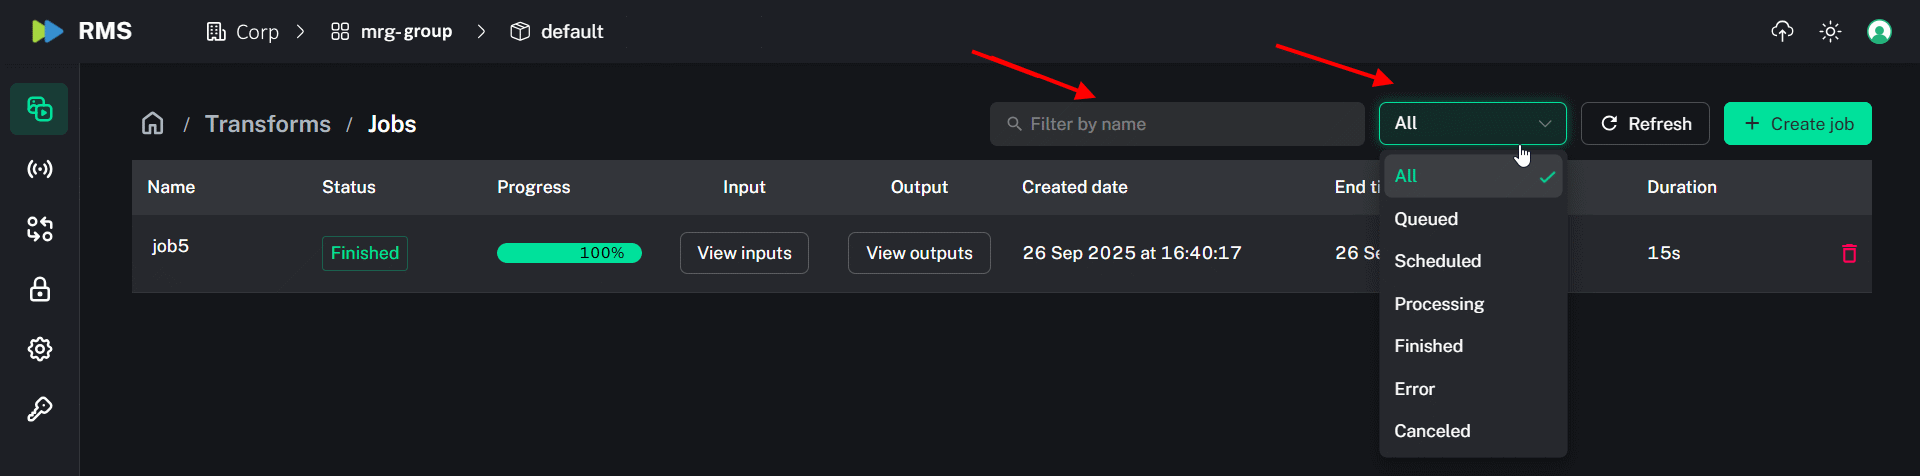
Job filtering
When searching for jobs in RMS Console, you can filter by:
Job name: Full-match search by job name. Type the job name in the search field to find specific jobs.
Job state: Filter jobs by their current state using a dropdown menu. Available states are: All, Queued, Scheduled, Processing, Finished, Error, and Canceled. For example, you can filter to show only Finished jobs to review completed work.
 Jobs lifecycle
When you submit a job, it appears immediately in the Jobs tab, where you can monitor its progress. Select a Transform to view its associated Jobs.
The system processes your media through several stages. To check a job's current status, click on Refresh to see the latest updates - the status does not update automatically. Filter jobs by job name (requires exact matching text) or by job status.
For the full list of job states, see Job status definitions.
After processing, the output asset content can be published, downloaded, or used for additional transformations. You can access it quickly by clicking View outputs on the corresponding job.
Troubleshooting
If a job shows an Error status, click the View Error button to see the complete error stack.
This will open a detailed error popup showing the specific error message:
Address the error-specific issues. If the error persists or isn't clear enough:
- Check whether the file isn't corrupt (plays normally on your machine).
- Ensure the format is supported by RMS.
- If the error suggests issues with media info or file properties, use the MediaInfo or ffprobe tool to inspect the file and verify its technical metadata (codec, resolution, duration, etc.).
-
Click Retry job - this is often the quickest solution for transient errors.
You can retry the same job multiple times if needed.
If problems persist after troubleshooting, contact Ravnur.